

Purchase a Print or
Download Wallpaper: 1920×1200 or 1600×1200
When Oksana and I were researching all the things we could do during our year of travel, one of the things I wrote down was “See a Shuttle Launch.” It’s not that I had any special interest in seeing one (though I do think space travel is pretty darn cool), it just seemed like one of those things you should do at least once. You know, like “see a total eclipse,” or “go skydiving.”
Turns out, when you live in Alaska, there can be some pretty tall hurdles to overcome before you can see a Shuttle launch.
First, they pushed the launch back three weeks… after we’d already purchased our tickets! Second, there really isn’t a good place to view the Shuttle launch for free, at least not where you have an unobstructed view of the gantry. My friends and I ended up paying a tour company $107 (each!) for a glorified bus ride to the NASA Causeway, a stretch of land that’s still 6 miles from launch pad 39A. Considering you need a press pass to get any closer, we decided it would be worth the cost.
Arriving at the Causeway was an adventure in itself. The launch was scheduled for 6:21am on April 5th, which meant we had to meet our bus at 11pm the night before, Easter Sunday. Our tickets included a free visit to the Visitor Center, but we only had about an hour and a half to go through there and it was very early and very crowded. Except for the last hour or so before the launch, that was all the time we had off the bus.
And that last hour was pretty stressful, too. As soon as the bus was parked, I tried to find the nearest available empty space against the barrier they’d set up. The Causeway was miles long and we were at the very end of it. I planted my tripod right next to the last row of porta-potties, figuring the fear of smells (there were none) might give me a little extra elbow room.
As we heard the countdown progressing from the loudspeakers, I tried to set up all my equipment. First, and most importantly, was my new Canon 5D mark II. I cranked the tripod all the way up to eye level, put on my 70-200mm lens with a 2x extender and then left it alone for a bit. On the ground, I started a Zoom H2 handheld recorder, just to see if I could get some audio of the rockets. Underneath the tripod, I put my old Canon Rebel XT body with a 28mm lens onto a rickety Gorillapod, just to see if I could get a bulb exposure of the fire trail. Finally, I balanced a box of Cheez-Its on a backpack for to make a semi-level floor for my video camera, a Canon HFS10. Once everything was in place and ready to go, I spent the remaining time reviewing settings for the 5D mark II on my iPhone.
6:21am was almost an hour before sunrise, so technically this was still considered a night launch. There’s no way you can meter the light for a shot like this; you either have to know in advance what settings you’ll use or trust your camera’s automatic settings. I decided instead to trust what I’d read online and quadruple-checked everything: Zoomed in to 400mm, set focus point and then switched to manual, UV filter removed, turned off image stabilization on the lens, manual mode, RAW, 400 ISO, F8/125, +/- 2 stops bracketing, burst mode.
At T-60min, I started the audio recording.
At T-20min, I started the video.
At T-5sec, I started the 30sec exposure on the Rebel XT.
And then, with my heart in my throat, at T+5sec, I started clicking away with my infrared remote.
I’d read that the Shuttle doesn’t clear the launch platform until T+6sec and I was very conscious not to fill up my camera’s write buffer with images before then. I snapped in bursts of three. Click-click-click. Click-click-click. Before I knew it, the Shuttle was already out of frame! 400mm is the bare minimum of what you want to shoot with from the Causeway – anything shorter and you probably won’t be able to resolve the Shuttle at all – but I can’t imagine how tricky it would be to follow the vehicle up with an 800mm or longer lens. It doesn’t seem like it on TV, but that sucker accelerates fast!
I quickly tried to loosen the tripod, reposition the camera, reach around the front with the remote and fire off three more. I managed to track the Shuttle a couple more times like that, but none of those photos came out as good as the first few. All the best pictures were taken well before the thunderous sound of the launch even reached us.
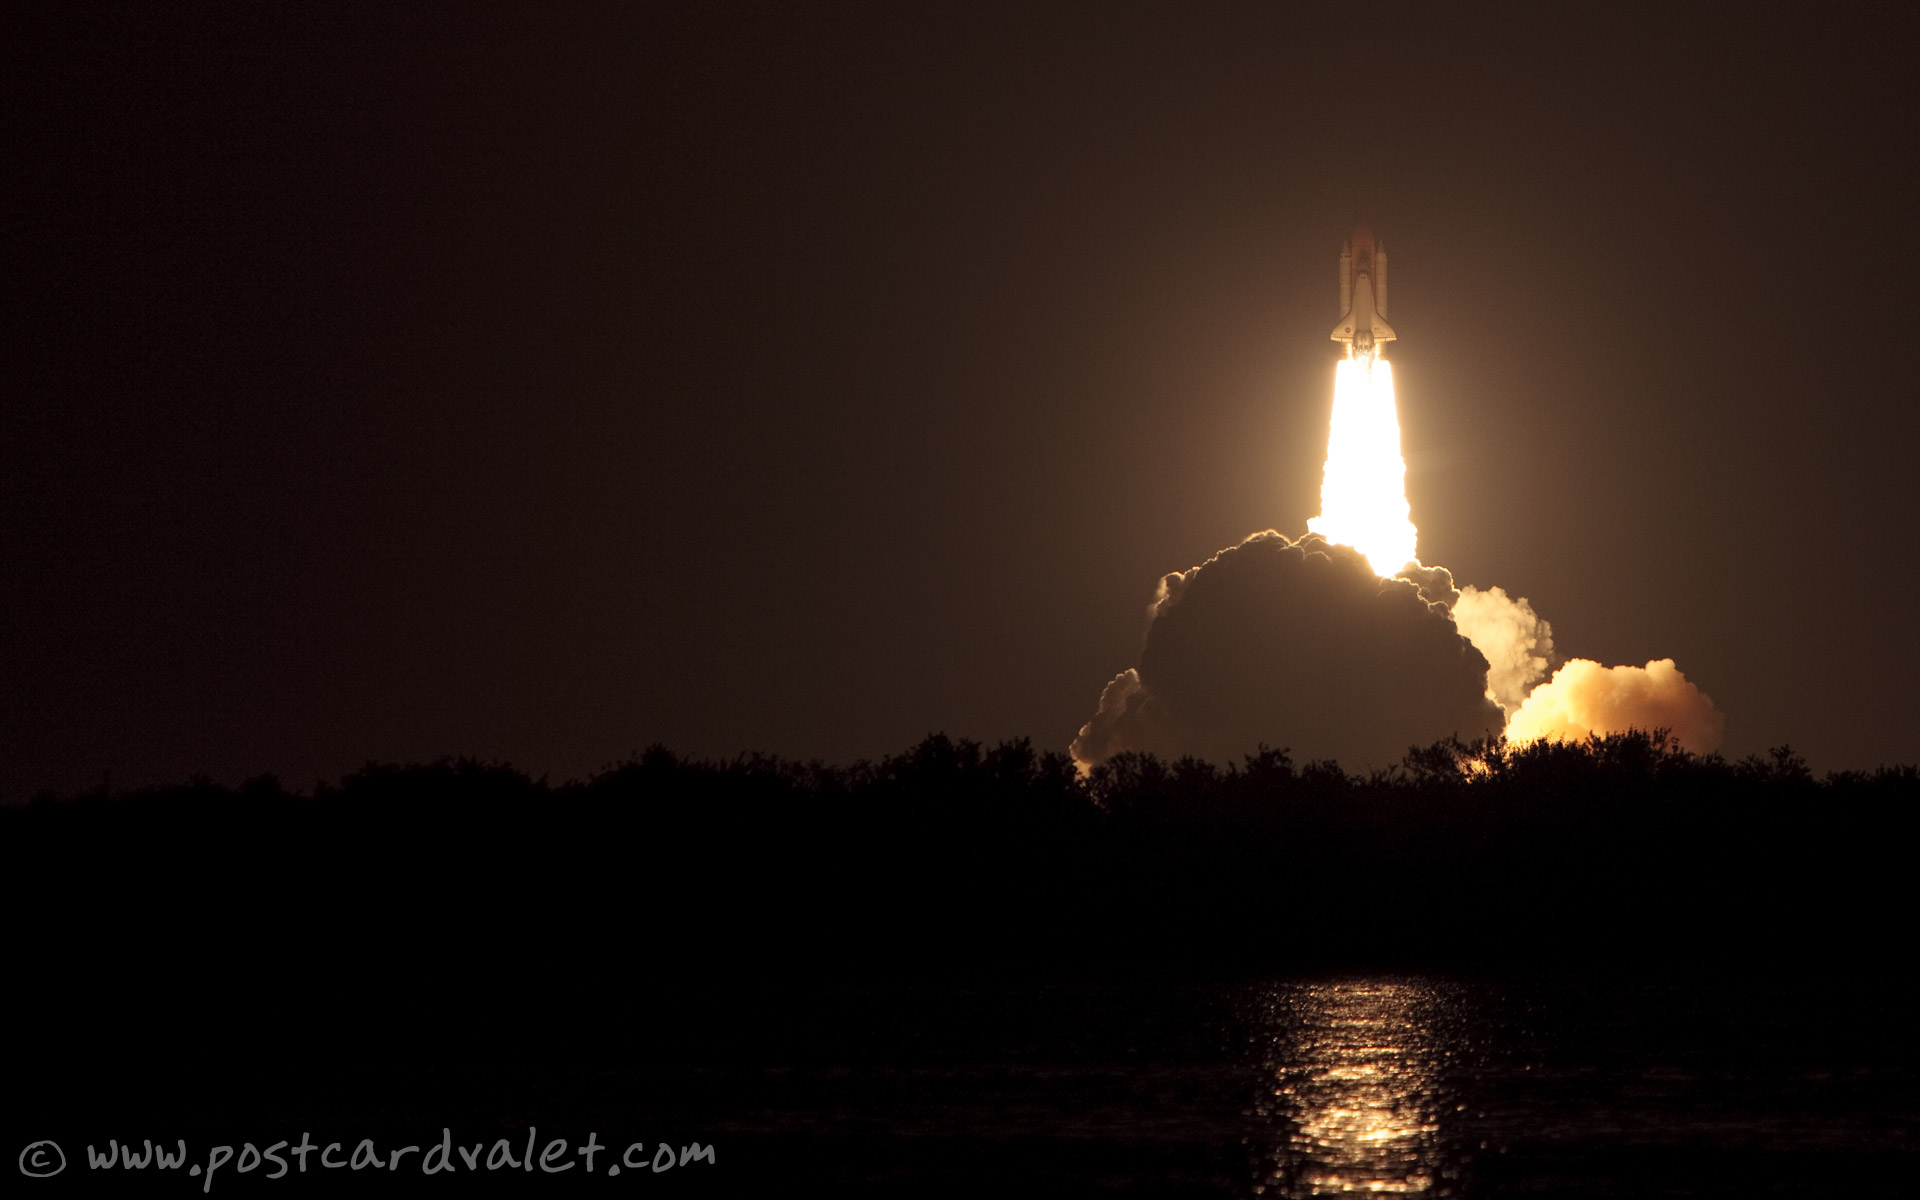
The photo above is my favorite of the bunch. It’s nothing special compared to the “professional” photos you can find on the web, but considering a night launch is so technically challenging, that this was my first one ever, and that I was using a brand new camera, well, I’m happy enough with the results.
(Regrets: I should have trusted the bracketing advice I read – the same site that gave me the F8/125 settings said to consider bracketing +/- 1 stops and I, conservatively, went for 2. +2 stops was just too bright. Also, there is a tiny part of me that wishes I had taken the advice to not even bring a camera to my first launch – to just enjoy it for what it is – because my memories of the event will always be tied up with the panic of trying to get a decent pic.)
If you’re interested, I posted other photos of the launch, and a video, on Facebook.
Canon 5D Mark II
Date: 6:21am, 5 April 2010
Focal Length: 400mm
Shutter: 1/500 second
Aperture: F/8
ISO: 400
Photoshop: Imported RAW file as “Camera Faithful.” Heavily cropped.
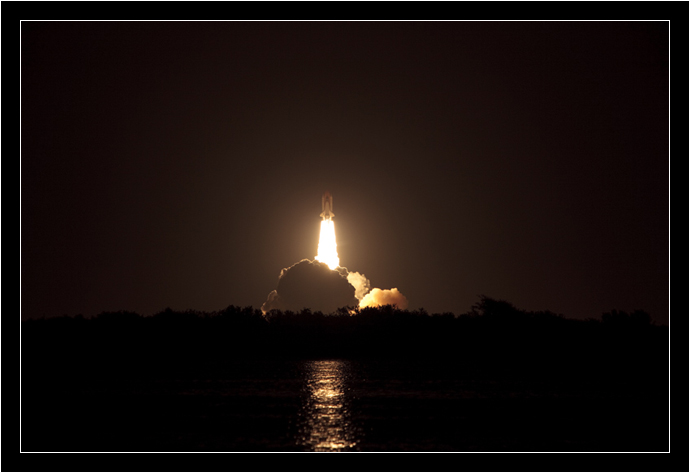
I love that a 21 MegaPixel image can be cropped so far down; it effectively gave me a longer lens. My heavily-cropped image is still almost 5 MegaPixels. For comparison, here’s what the camera saw at 400mm:
Great story about seeing the launch. Would you have ever imagined returning so quickly and getting to see things up close (3 miles away) at the NASA Tweetup.
I am @WinObs and I will also be there. I look forward to meeting you.
Rich
Thanks, Rich. No, I would NEVER have thought I’d make another launch. I still can’t believe I have the opportunity!